Setting up a call center does not have to be a daunting task. With Go dial’s seamless interface and easy-to-use Web Dashboard, setting up your call center is just a click away.
In this tutorial, we’ll get you started on how to add members to your Godial CRM platform. Follow the steps below to effectively manage your team.
Step 1: Login Into Your Account
Open your browser and navigate to the Godial CRM login page. Enter your registered email address and password to log in.
Once you log in, you will come across Go dial’s Web Dashboard.
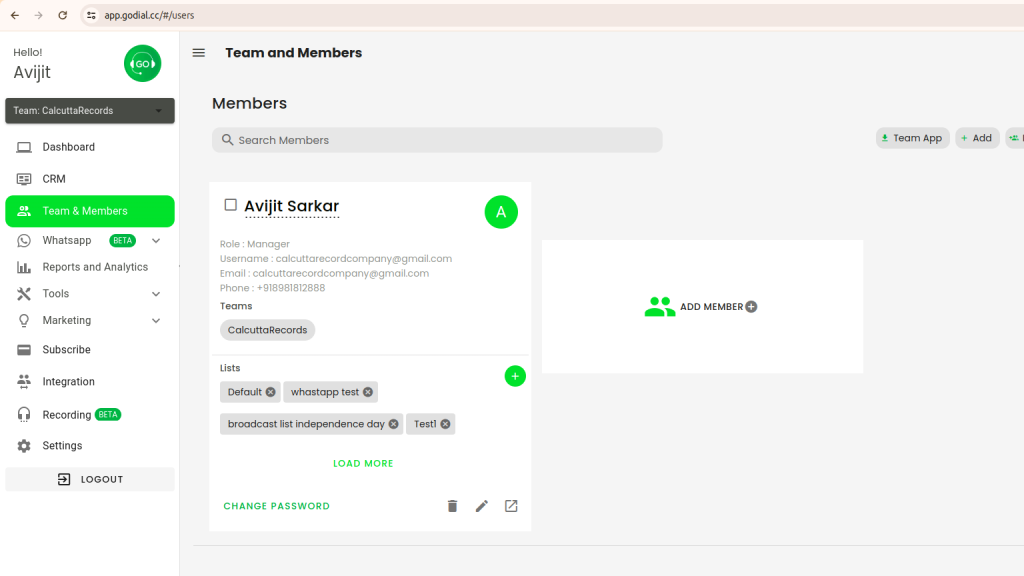
Step 2: Navigate to the ‘Members’ Section
- Once logged in, you will see the dashboard.
- On the left-hand side menu, look for Team/Agents or Members. This might be labeled as “Manage Team” or “Team Settings” depending on your GoDial version.
- Click on Team to open the member management page.
Step 3: Adding a New Member
- On the Team Management page, look for the option to add a new member. This will typically be a button that says Add Member or Add Agent.
- Click on Add Member.
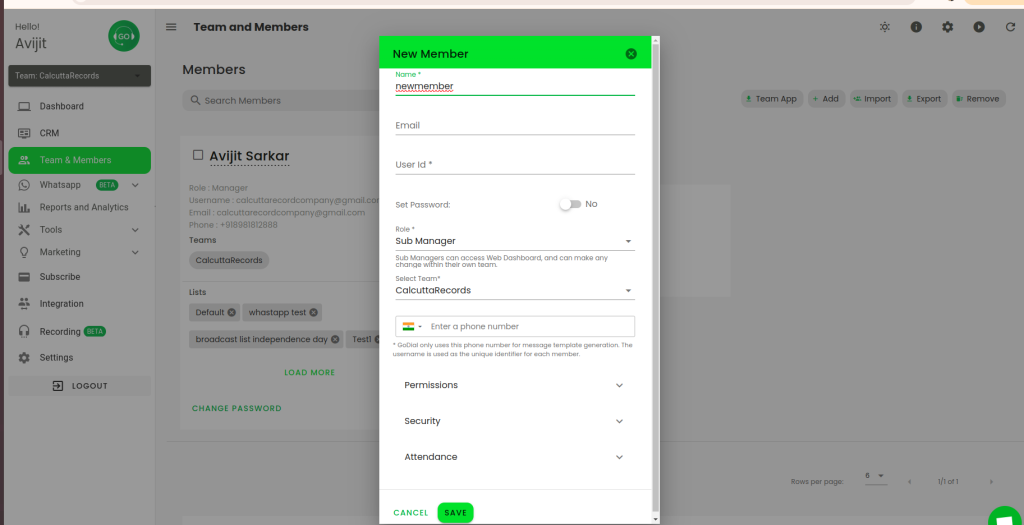
- You’ll be prompted to fill in the details for the new member. Enter the following:
- Name: The full name of the new member.
- Email: The member’s email address (used for login).
- Phone Number: Their contact phone number.
- Role: Select the role (Team Lead, Agent, or Custom Role).
- Access Level: Define what the member can see and do (Full Access, View Only, Edit Access, etc.).
- Assign the member to a Team or Group (optional). You can group members by departments or campaigns.
- Click on Save or Add Member to finalize adding the team member.
Step 4: Send Invitation
- Once the member is added, GoDial may send them an invitation via email.
- The member will receive an email with instructions to set up their password and log into the GoDial platform.
Step 5: Assign Tasks and Leads
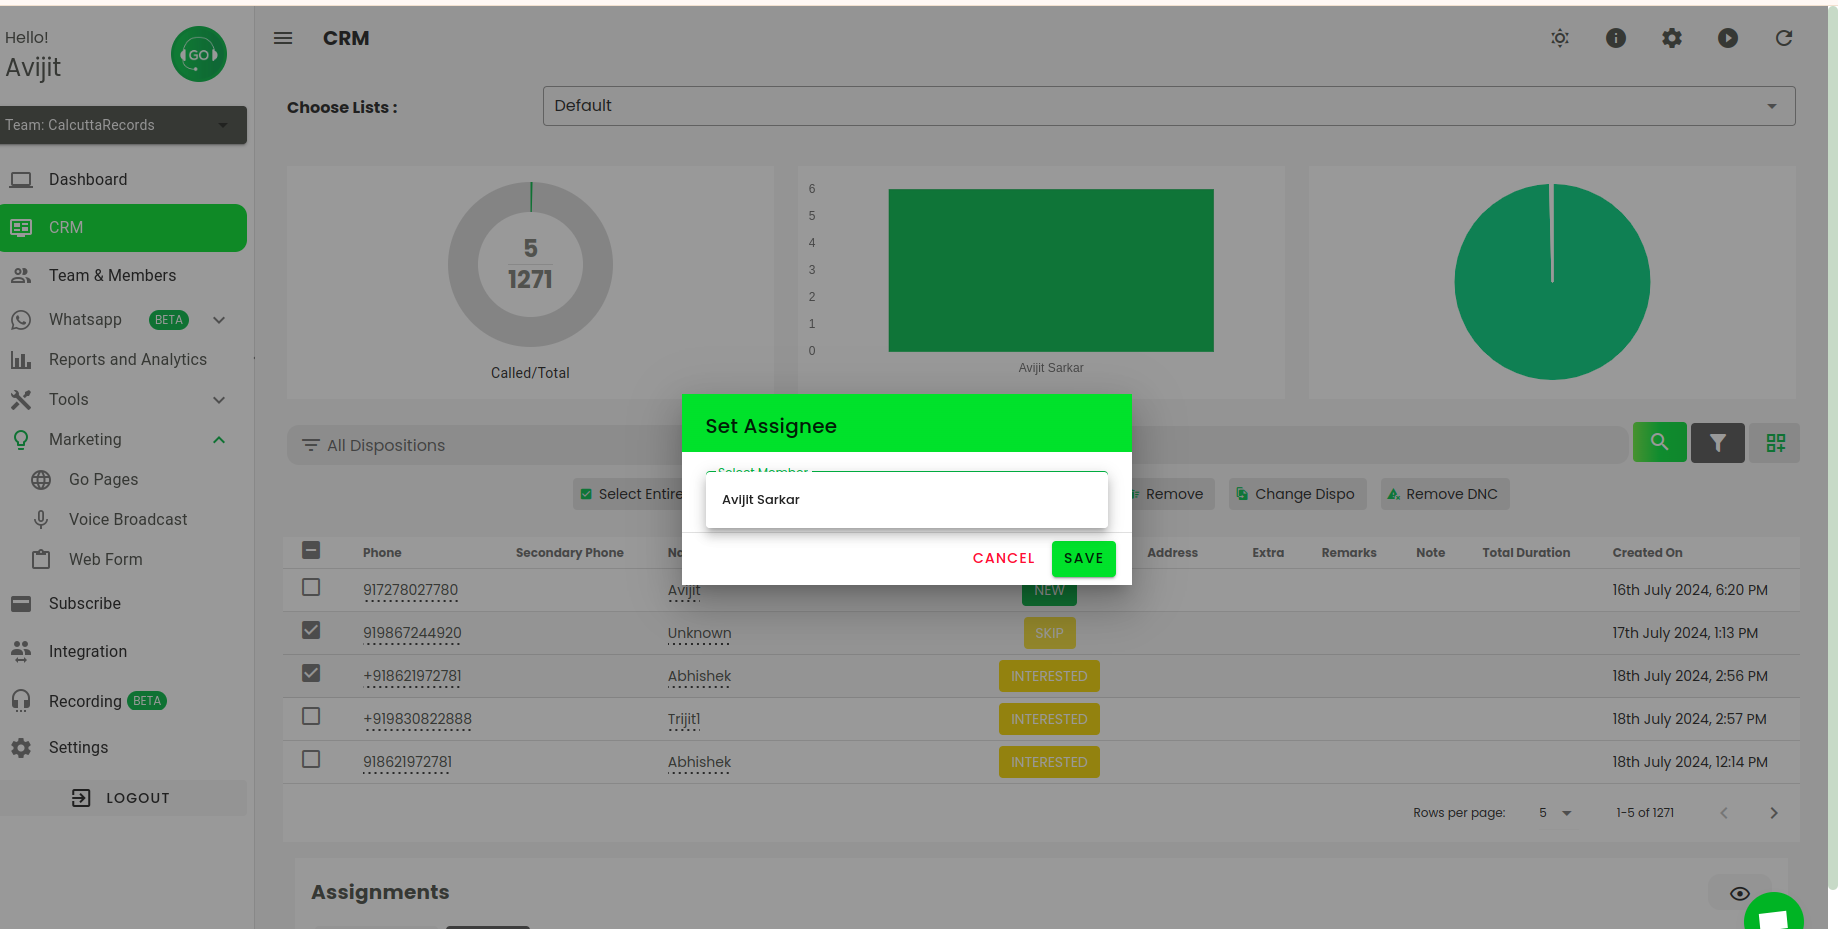
- Go to the Leads/Contacts section in your dashboard.
- You can now assign leads or tasks to the new member you just added. Select leads and click on Assign or Allocate to the member.
- You can also assign them to specific call lists or campaigns.
Step 6: Review and Manage Members
- You can view the list of members in your Team Management section.
- If needed, click on a member’s profile to edit their information or deactivate them from the system.
Tips:
- Ensure your new member has access to the necessary call scripts, campaigns, and data to begin working effectively.
- You can always edit permissions for each member under the Team Management section if you want to restrict or expand their access later.
- Some of the permissions include allowing CRM access on app, skip call, call recording, show only my contacts, call log access. You can choose to delegate permissions to your sub-manager and agent accordingly.
By following these steps, you can easily add and manage members in your GoDial CRM system, making your telecalling process smoother and more organized.
If you need further assistance or have any questions, feel free to reach out to godial’s support team or refer to their documentation.


