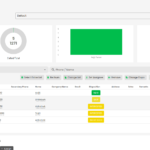
GoDial is a powerful telecalling CRM that simplifies managing leads, customer interactions, and sales processes. One of its standout features is the ability to pre-assign data to your team, enabling seamless call distribution and follow-ups. Pre-Assigning data ensures that each team member gets a specific list of contacts, helping them focus on their targets and avoid data overlap.
To ensure you are following the right method, we’ll walk you through the steps to pre-assign data to a team, covering the various aspects.
Steps to Pre-Assign Data in GoDial
Follow these simple steps to pre-assign data to your team using GoDial:
1. Log In to Your GoDial CRM Dashboard
To begin, log in to your GoDial CRM account. Ensure you have admin or manager access to be able to assign data to other users.
2. Navigate to the Data Section
Once logged in, go to the Data section on the left sidebar. Here, you’ll be able to upload new data or access existing lists of leads and customer information.
3. Select the List of Contacts to Assign
You can either upload a new CSV file containing your contacts or select from an existing list of contacts. Make sure the list contains all the necessary information, such as name, phone number, email, and any other required fields.
4. Use the Preassign Feature
GoDial’s Preassign Data feature allows you to assign contacts to specific team members. Simply click on the “Preassign” option next to the contact list.
5. Select Team Members for Assignment
From the drop-down menu, choose the team member(s) to whom you want to assign the data. You can assign contacts to one or multiple team members. You also have the flexibility to assign a specific number of leads per team member or distribute the list equally.
6. Set Assignment Criteria (Optional)
If you want to set specific criteria for lead distribution (e.g., geographical area, contact age, or lead score), GoDial provides filters to narrow down the data before assigning. This ensures each team member gets the most relevant leads to work on.
7. Review and Confirm the Assignment
Before finalizing, review the assignment details. Ensure the correct number of leads is assigned to each team member and that the data is accurate. Once satisfied, click Confirm to assign the data.
8. Monitor the Assigned Leads
Once the data is preassigned, each team member will see their assigned contacts in their GoDial dashboard. As the admin or manager, you can monitor the progress of these leads, checking call logs, customer interactions, and sales outcomes from your dashboard.
Best Practices for Pre-Assigning Data
- Keep Data Updated: Regularly update your contact lists to ensure your team is working with the most current information.
- Set Goals for Each Team Member: Assign specific goals or targets to your team members based on the data assigned, and track their progress to ensure leads are being followed up properly.
- Leverage Call Insights: Use GoDial’s detailed call insights to track performance and improve your lead assignment strategy over time.
- Balance Lead Distribution: Make sure not to overload any single team member. Assign data evenly and equitably to maintain motivation and productivity.
Conclusion
Pre-Assigning data on GoDial is a simple yet effective way to streamline your team’s operations, ensuring organized lead management and improving overall sales efficiency. With clear assignment responsibilities, better tracking, and increased productivity, your team will be able to focus on closing deals without worrying about data overlaps or confusion.
By following these steps, you can maximize the potential of your team and create a more structured approach to telecalling and CRM management. Keep optimizing your data assignments as your business grows, and watch your team’s performance improve.


